
I will start this post off with a project that kept me busy at the end of August. My Aunt Sharon is a favorite of mine. She is honest, open and a pleasure to be around, plus a total goofball like me.

Aunt Sharon on the left, me on the right sporting Elmo party hats at her granddaughter's first birthday.
At times we make inappropriate comments about other family members, one in particular. I was the unfortunate witness to a massive, figurative, train wreck that was this particular family member. At this point I found it completely necessary to take multiple pictures and e-mail them to her. Her reply was of complete and utter disgust to which I decided I needed to print these pictures and make some sort of scrapbook to put them in. For her of course.
"Ah ha!" I can finally make the fabric scrapbook that I have been dying to make forever.. and soo.. here it is! (Well, after I show you how it was made)
This is a great way to use up your scraps, both fabric and paper.
The only items I purchased for this album was the pink plaid fabric and the metal heart on the front... totaling $1.75.
$1.50 for the fat quarter and $.25 for the heart at a garage sale; I love deals.
Using felt (4 for $1 at hobby lobby) as the pages gives some sturdiness. I was also able to find sticky 5x7 scrapbook matting paper on clearance. I'm not including this in my price for this because I only used about 6 sheets, if that. You will also need Liquid Stitch (or other fabric type glue), hot glue gun and a needle and thread. Yes, I know, hand-sewing is horrible. :(
The rest of this is up to your imagination and what you have on hand.
First of
 f, determine
 the size you would like the album to be and how many pages; cut the felt and fabric accordingly.
I am addicted and dependent on a rotary cutter, self healing mat and acrylic ruler. Use what you are comfortable with.
Once you have the felt and fabric cutout for the pages and covers, use liquid stitch to attach the fabric to the felt for the covers. You will eventually end up sewing, this is to just keep yourself together.
Stack all pages together and decide where you will be putting the buttons (or stitch) to hold it all together. Mark with sidewalk chalk so it will come off later and you will know where to not decorate.
At this point let your imagination run wild and design your pages.
(I marked out the pictures that I used because I don't want any proof that I took them or spread the love around.)
 Through out
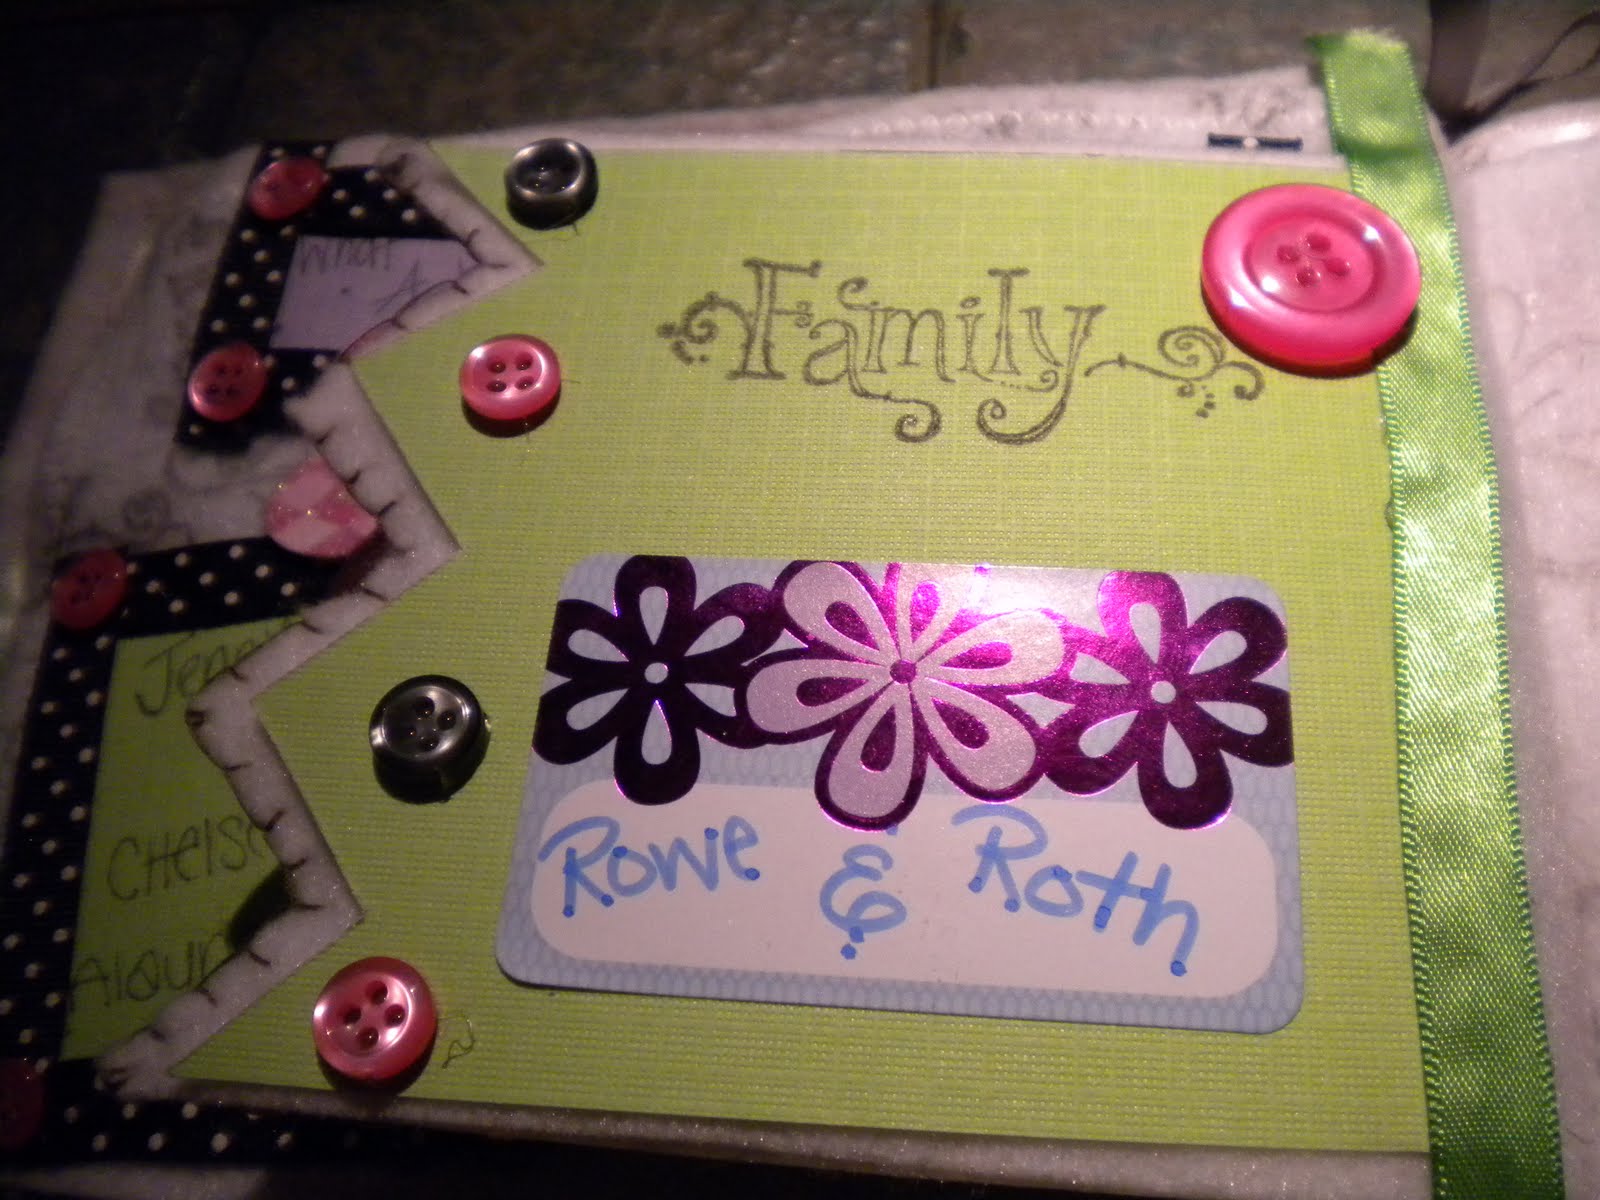
  all this, buttons were my best friend! They matched perfectly with the feel and look of this project.
<~ half of my button wonderland
The page to the right ended up my favorite.
To get this look I shaped the felt and paper together and stuck the paper to the felt.
(what a great invention - sticky matting paper)
Then I stamped the daisy all over, even on the felt, using an acrylic stamp and ink it up ink. Using scrap green sticky paper from another page I hole punched enough green circles to use as the center of the flowers. I added a few scrapbooking flower stickers and 'Voila!', masterpiece.Here are a few of my favorite pages


 I apologize now on the photo quality, time was of the essence. I took these while packing and running out the front door.

For the cover I took sticky chipboard letters and painted them corresponding colors to spell the word 'AUNT'.
I colored pink sidewalk chalk over the heart and rubbed it off... making it look a little softer.
Lay everything out then hot-glue down.

Using a thread and needle,
add some wonderful finishing touches
To put the book together I used three buttons
 and ribbon. (see above photo of front cover) Hot glue the ribbon down on the front where you would like to put the buttons. Once cooled, sew the buttons on, going through all the pages to hold them together. Make sure you leave some slack so they don't end up popping off.
Glue another piece of ribbon on the back of the album over the thread where the buttons were sewn on. Like this ~~~~~~~~>
ALL DONE!!!
Here is a rundown of my finished pages in order....


THANK YOU for enjoying my fabric scrapbook album. This was a fun project to work on and give. I made her cry with the first page, then she saw the funny pictures. To not be a total waste I did use double sided tape where she could take them out and put in pictures of her other nieces. As an aunt, she has no nephews - except those that have married in.
Stay tuned for some more photowalking pictures and more crafts - a germ (inside, but cute, joke) and a baby blanket for a gal at work.
No comments:
Post a Comment